In order to use the Zapier integration with Addo Sign, it is important that the correct proxy is set up. This is something you as a customer can set up yourself, as you will run through this guide, but it is something our support will be happy to help you with if you want to set up a Zapier integration with Addo Sign.
Steps for creating the integration
Step 1: Create a Zap
Step 2: Create a trigger
Step 3: Select app and trigger
Step 4: Log in to your Addo Sign account and create a Proxy
Step 5: Create a webhook in Addo Sign
Step 6: Test if your integration between Addo Sign and Zapier works
Step 7: Choose an action
Step 8: Log in to your Google Drive
Step 9: Choose where the document lands
Step 10:Test if your integration works
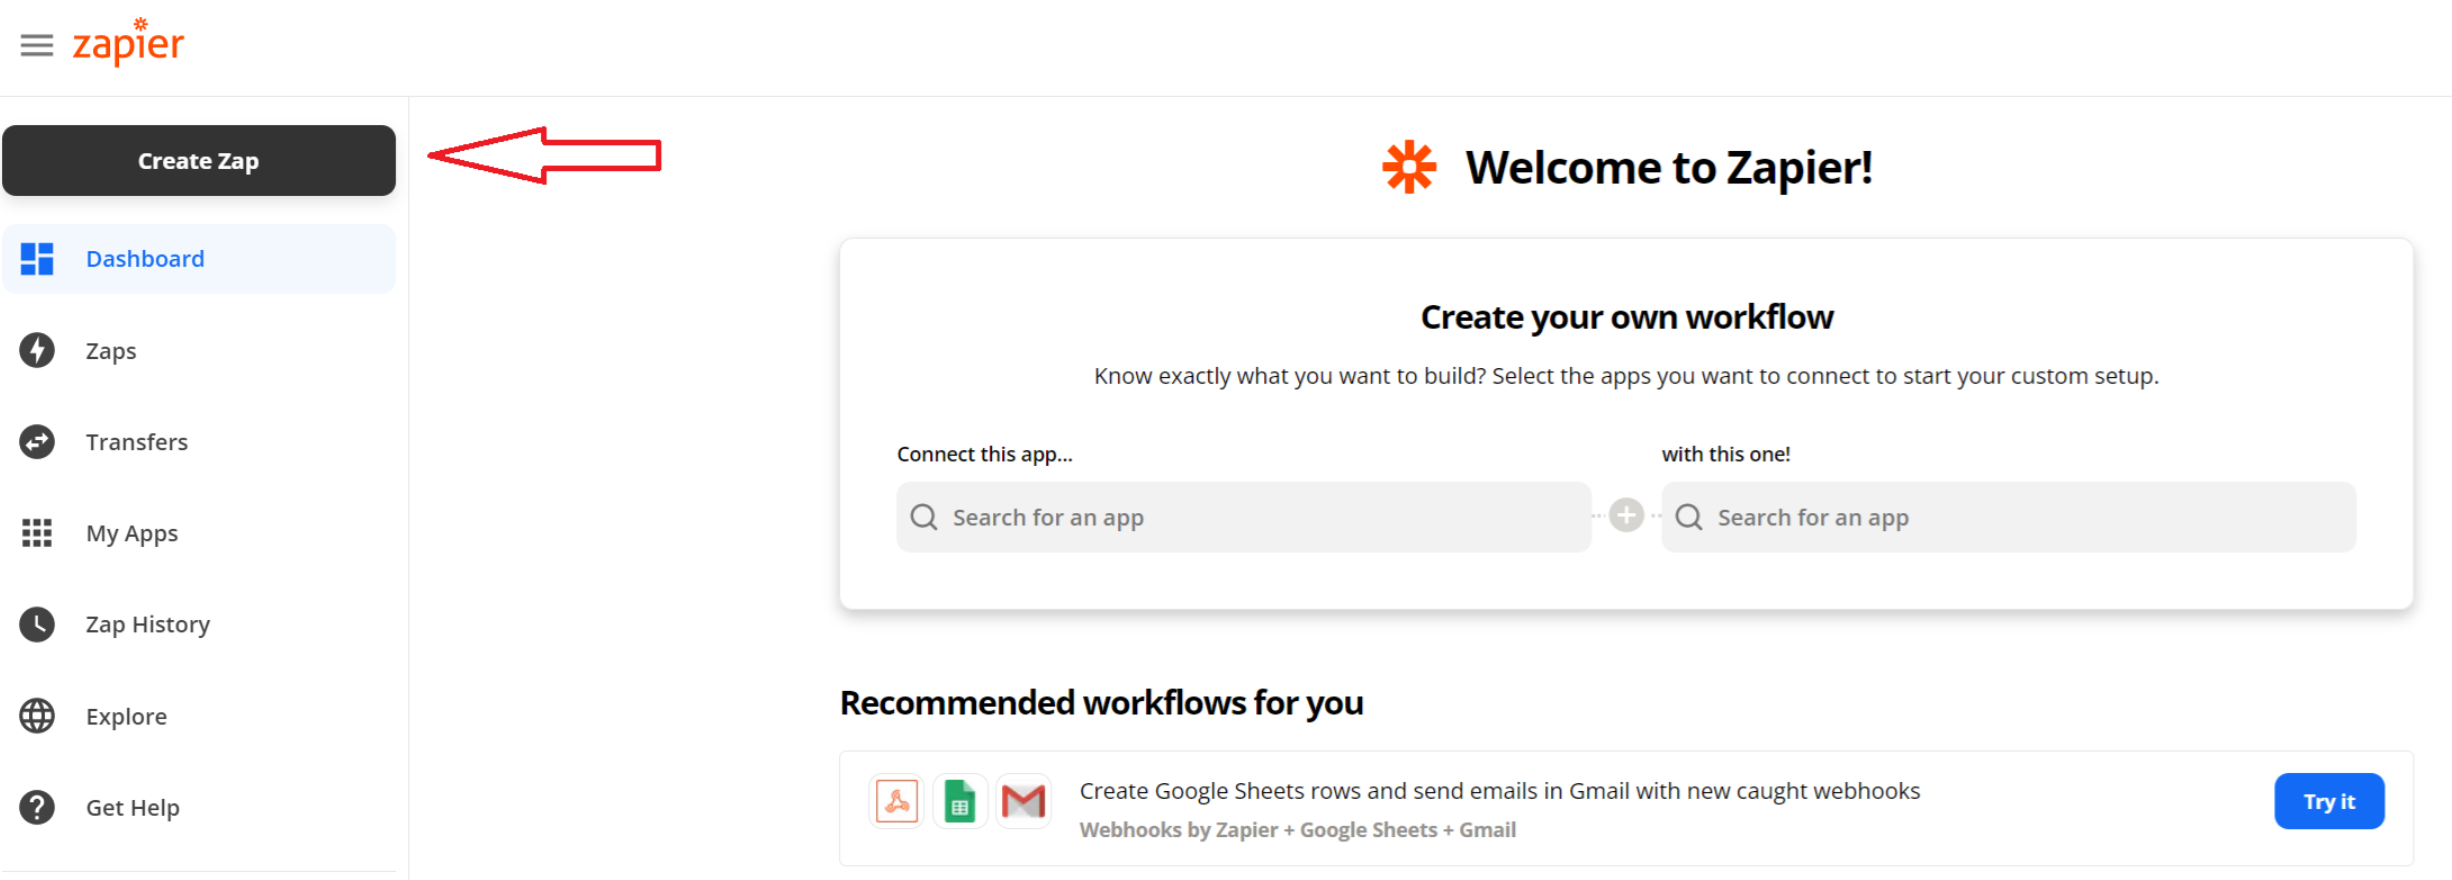
Create a "Zap"
An integration is referred to in Zapier as "Zaps", a Zap is therefore the association you create between the systems and the first step to using Addo Sign with your archive system.
To start, simply press "Create Zap"
Create a "Trigger"
A Trigger should be understood as the trigger to start the integration, therefore in this case a trigger simply means that every time a document is signed by all parties and the document needs to be archived, Zapier is activated and automatically puts the document in the right integration and folder for you.
To create a trigger, which in this case is Addo Sign, you can simply hit the search bar and enter "Addo Sign" to find the integration
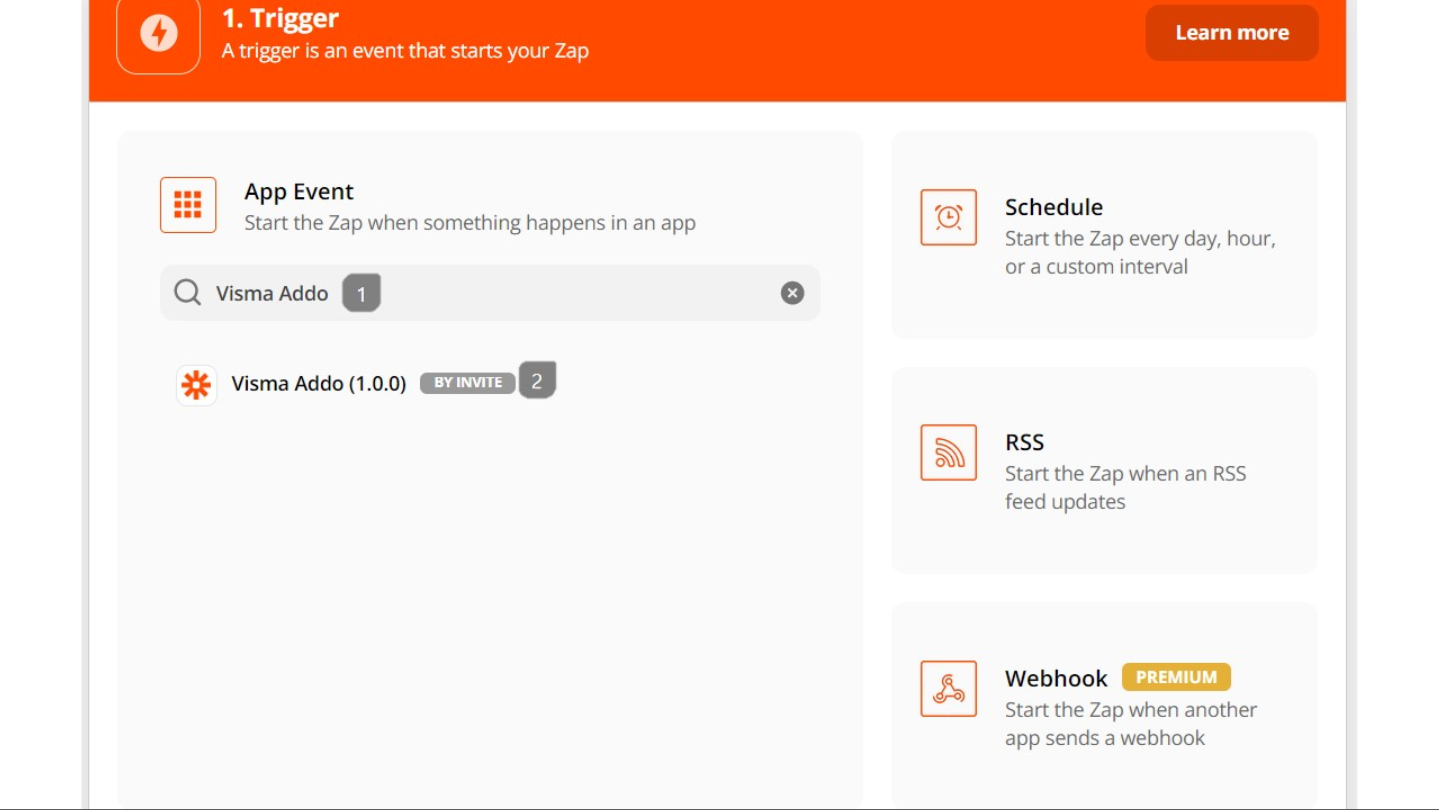
- Press the search bar and enter "Addo Sign"
- Select the Addo Sign app in Zapier
Select app and trigger
Here a "Trigger event" is selected in Zapier - This is the event that starts the Zapier integration. As there is only 1 trigger event to select, simply select this one
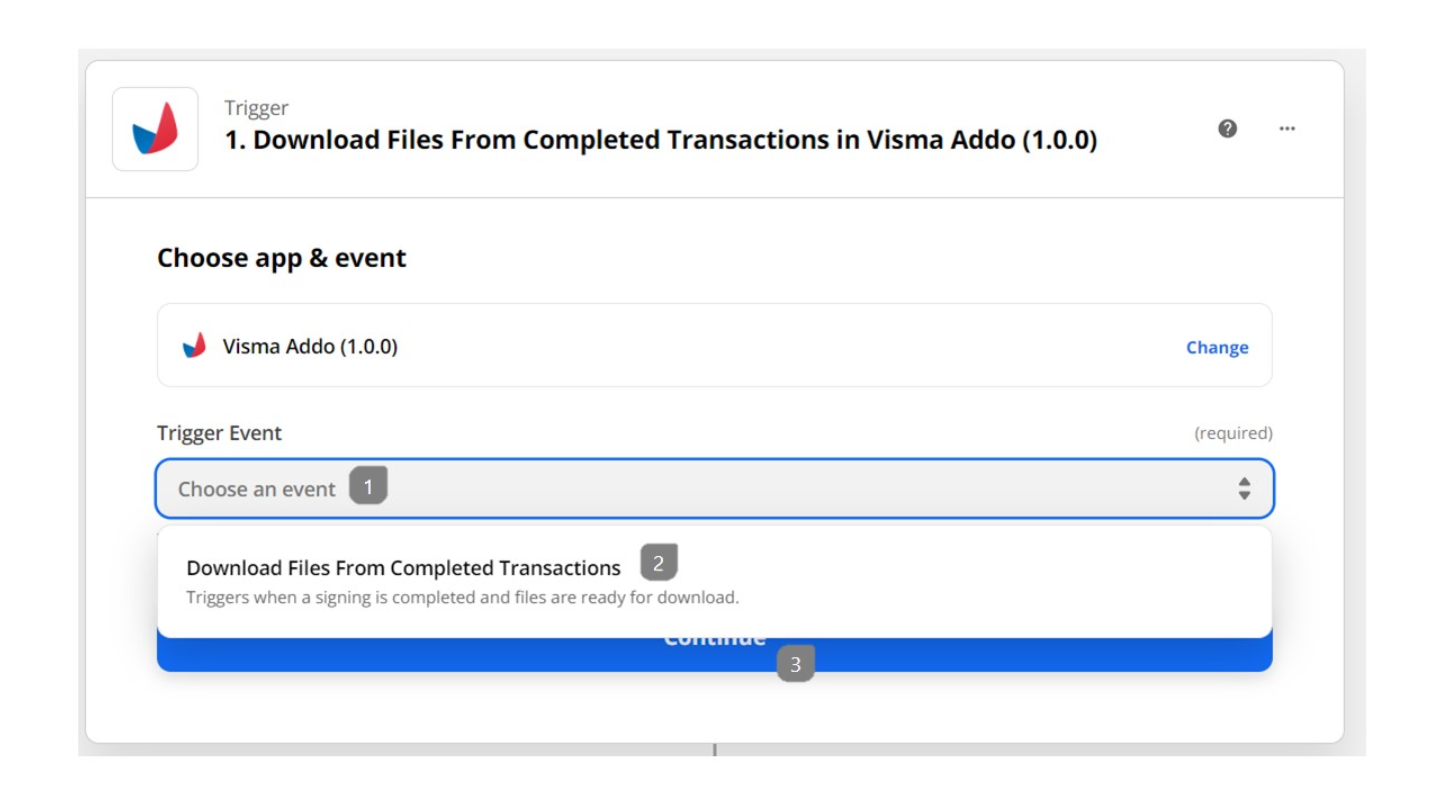
- Press the search bar "Choose an event"
- Select "Download files from completed transactions"
- Press "Continue"
Log in to your Addo Sign account and create proxy
Now it gets a bit more exciting, as we need to generate an API key that allows you to send Addo Sign data through Zapier.
In the next step, you therefore need to select the account against which the integration will be integrated. So this is the account who will be delivering the documents in the integration once it is signed and completed.
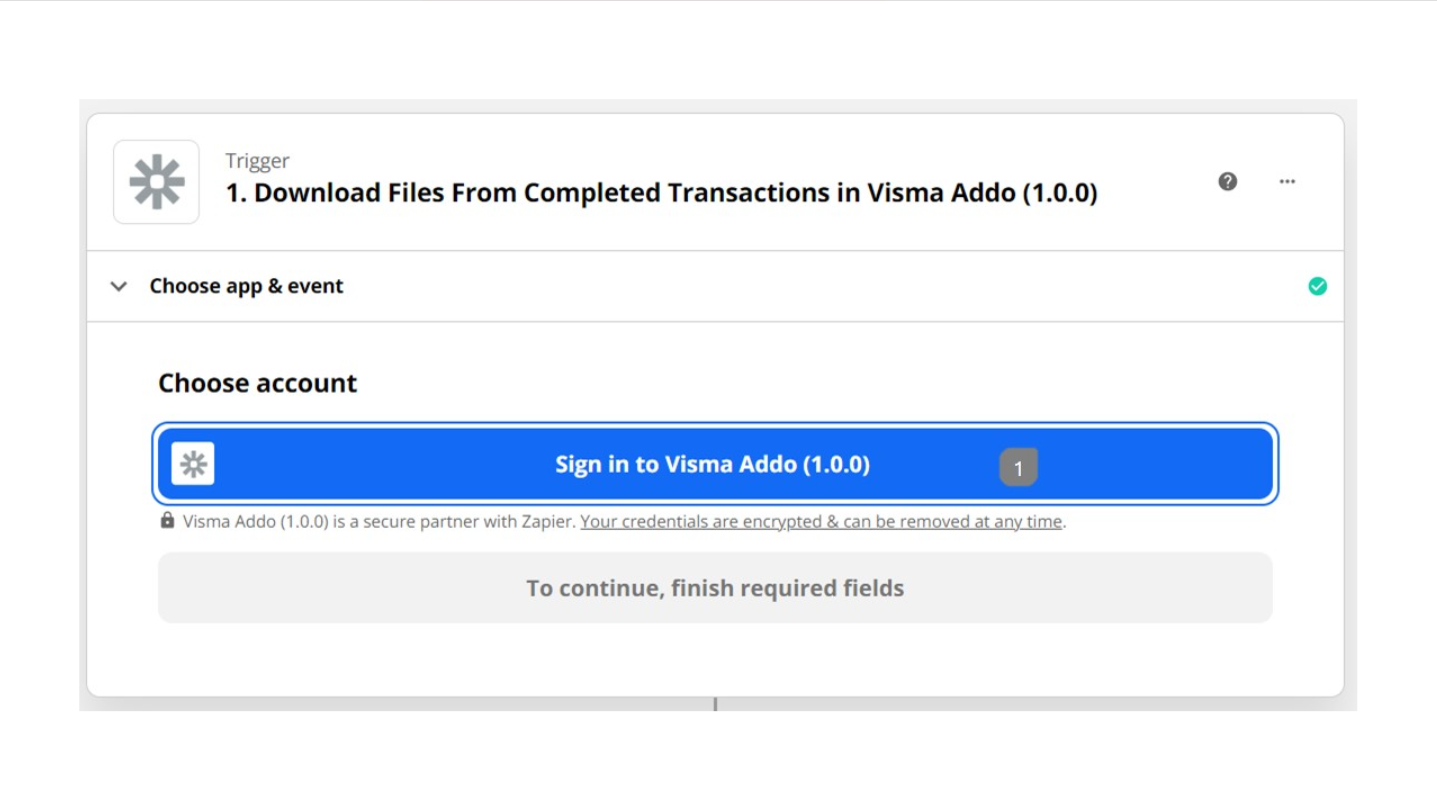
- Press "Sign in to Addo Sign"
Once you have pressed "sign in to Addo Sign" a pop up will appear where you simply need to press the link called "https://Zapprx01.vismaaddo.net"
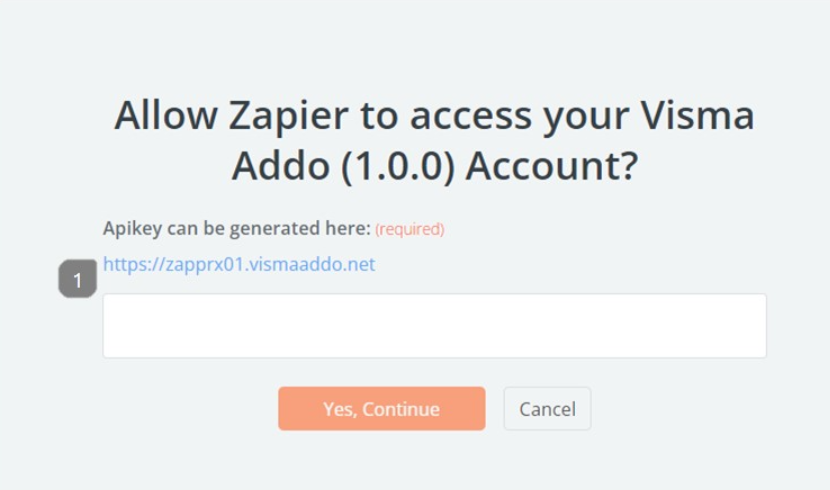
- Click on the link, as through the link at pop-up comes up where you can create your API key
You will now be presented with a log-in window. Here you need to enter your Addo Sign credentials: this is the username and password that you usually log into Addo Sign with.

- Enter your Addo Sign username - this will always be an email
- Enter your password for Addo Sign
- Press "SIGN IN"
The next window you will be presented with is your ZapierID. It is important that you copy your entire ZapierID, as it is this ID or key that makes everything talk together.
Please keep it somewhere as you will need it again :)
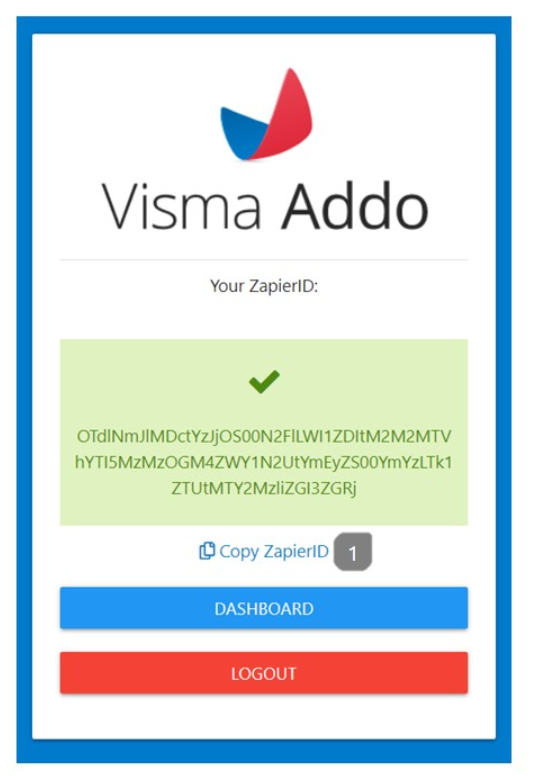
- Press "Copy ZapierID"
The API key or ZapierID is then inserted into the empty field in the previous window.
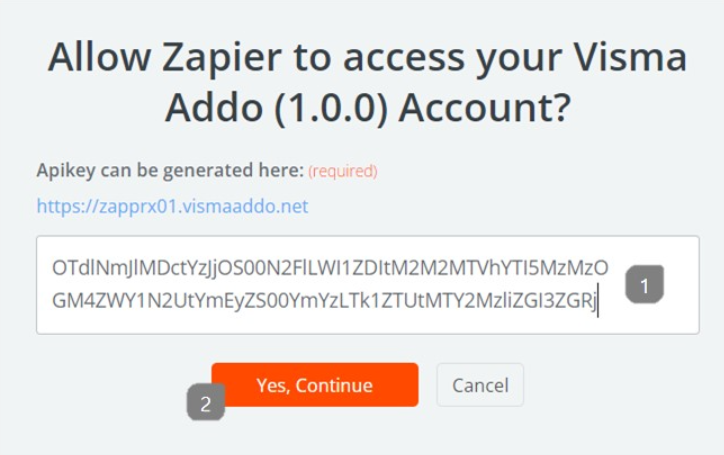
- Right click and press "paste" or press in the white area and press CTRL + V on your keyboard
- Press "Yes, Continue"
Create a webhook in Addo Sign
Now that we have set up a connection between Zapier and the Proxy, we need to have the Proxy connected to Addo Sign.
This is done by inserting the above API key after this URL:
https://zapprx01.vismaaddo.net/signingtoken?ZapierID=INSERT API KEY HERE
Example: https://zapprx01.vismaaddo.net/signingtoken?ZapierID=OTdlNmJlMDctYzJjOS00N2FlLWI1ZDItM2M2MTVhYTI5MzMzOGM4ZWY1N2UtYmEyZS00YmYzLTk1ZTUtMTY2MzliZGI3ZGRj
We then need to insert this API key as a webhook in Addo Sign in the "Completed" field.
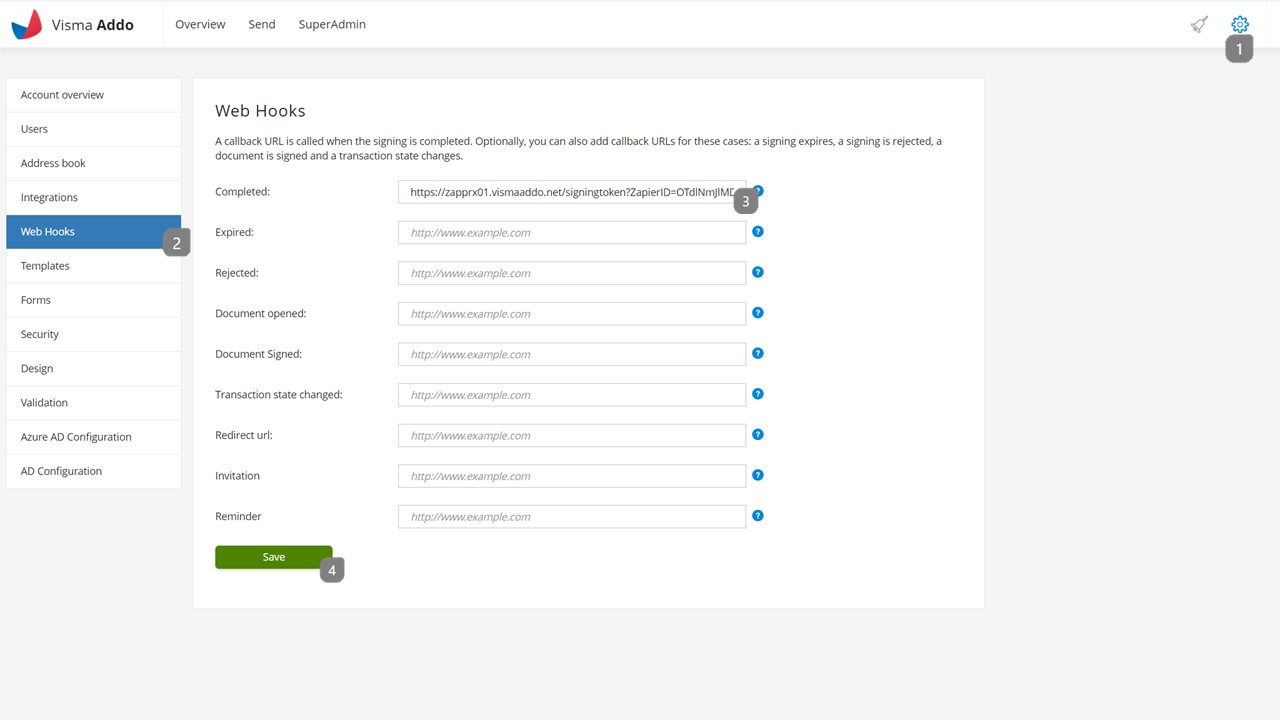
- Press settings
- Select Web hooks
- Insert https://zapprx01.vismaaddo.net/signingtoken?ZapierID=YOUR API KEY in the box for completed transactions
- Press "Save"
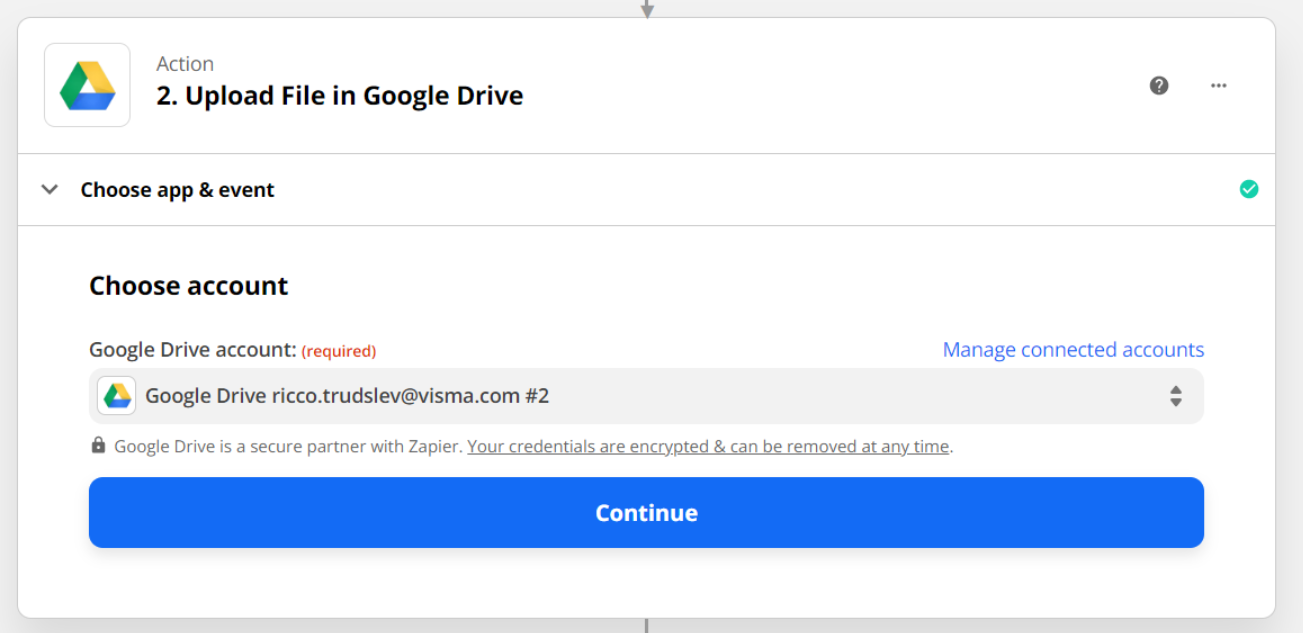
Your account is now linked in Zapier. It should therefore look like the next picture, where you only need to press continue.
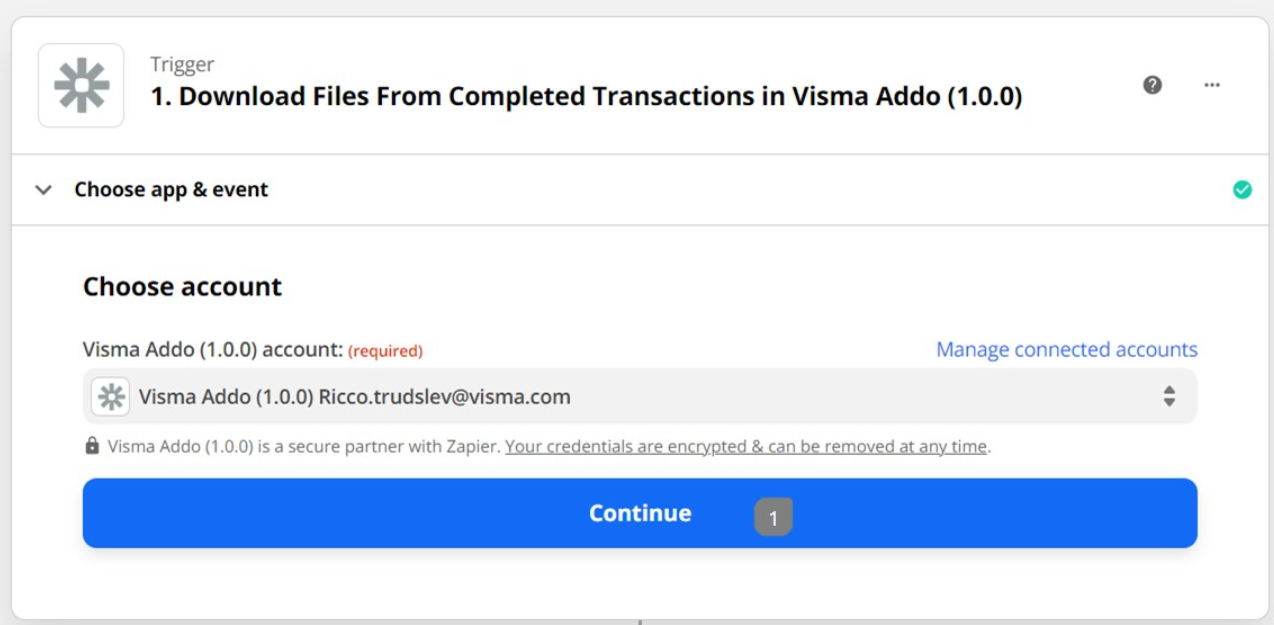
- press "Continue"
Test if your integration works
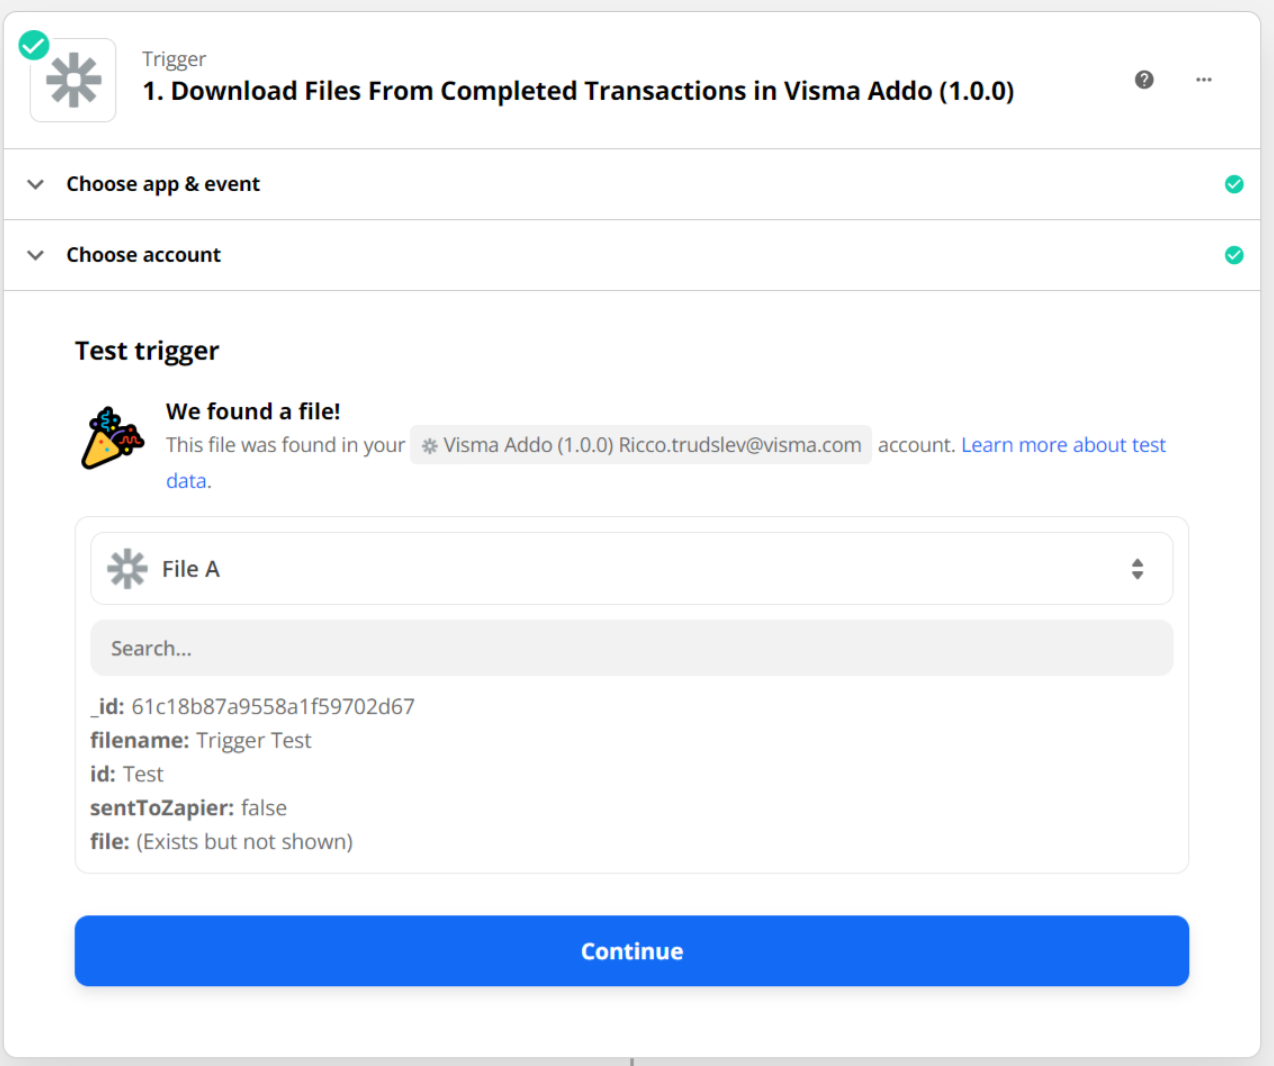
The next window allows you to test that your integration with Addo Sign is set up correctly. Therefore, simply press "Test trigger" to see if Zapier can talk to Addo Sign.
You should get a window like below, if your integration is set up correctly, where you just press "Continue"
Select an "Action"
An action in this case is your archive solution that Addo Sign should put the files with. This is the last thing that needs to be done for the integration to work.
In this example I choose "Google Drive" as my integration.
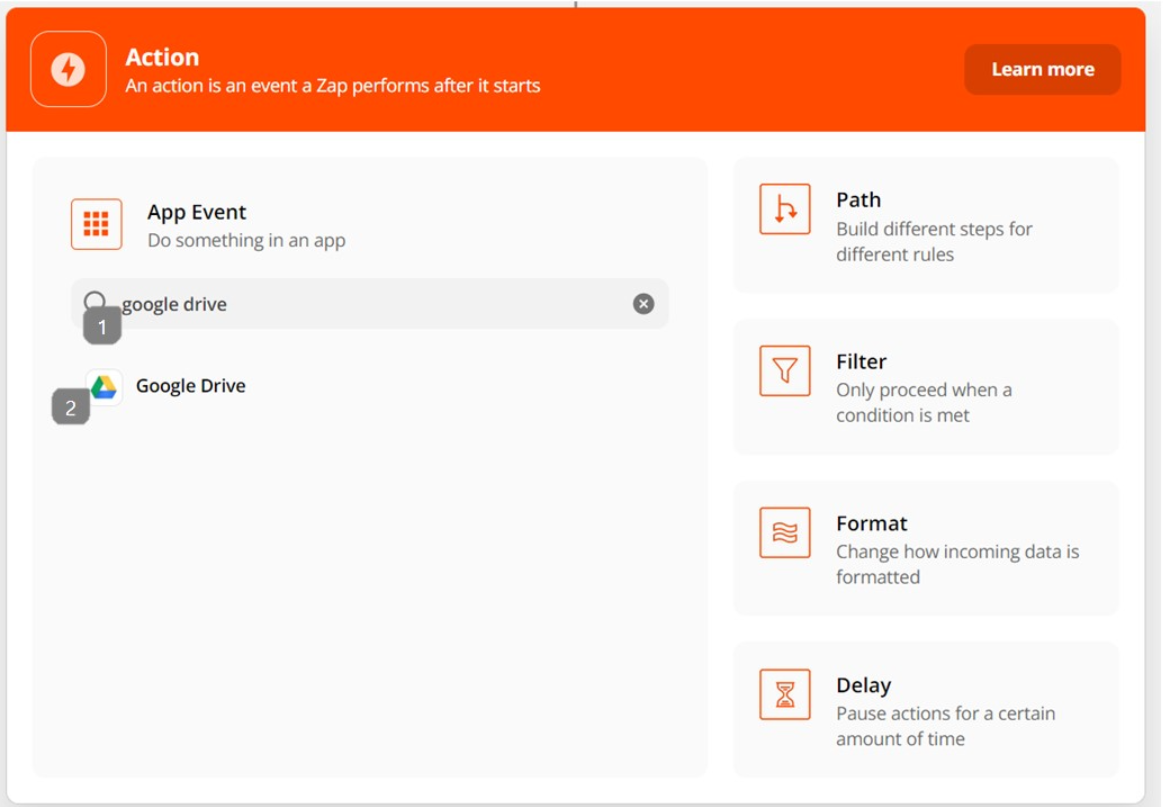
- Press the search field for the integration/archive solution you want to integrate against. In this case I have chosen "Google Drive"
- Tap on the app that you want to integrate with.
Now that we have selected Google Drive as the app that we want to integrate up against, we also need to select what the app will do when it receives a document from Addo Sign.
Since I want to use it as an archive solution, I want a document to be uploaded into Google Drive.
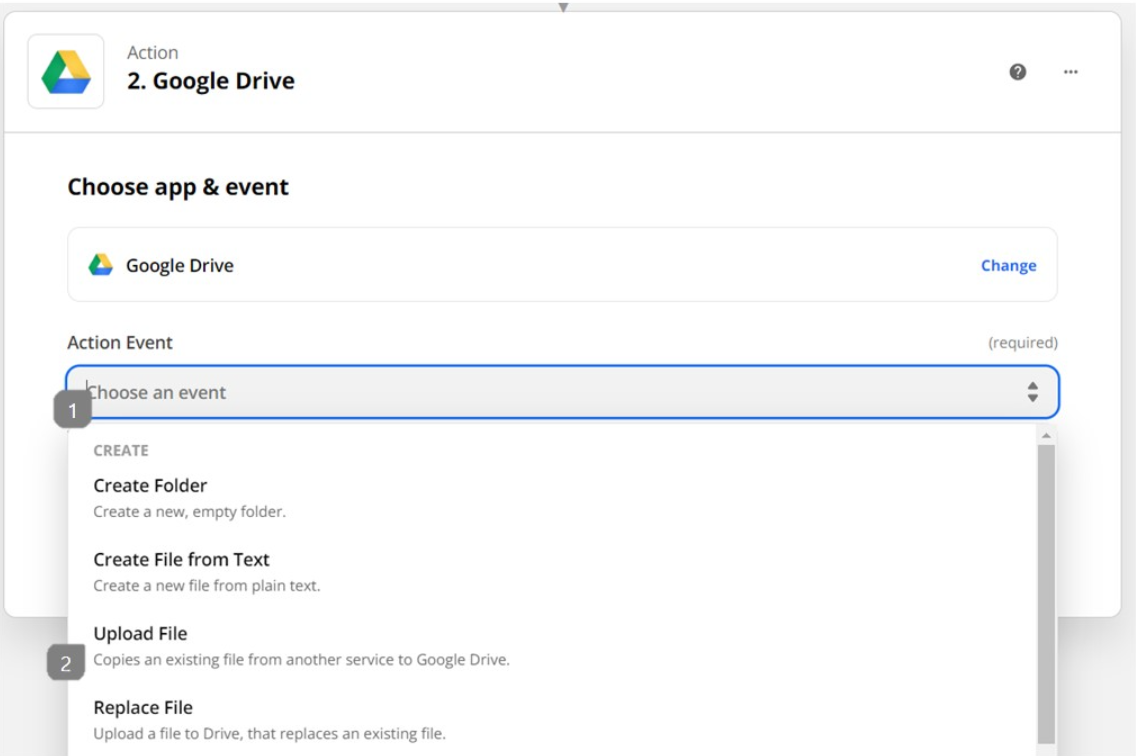
- Press the search bar "Choose an event"
- Select "Upload File"
- Press "Continue" when it reads blue, after you have selected "upload File"
Log in to your Google Drive
Since you are integrating against an application, Zapier will need your login information from the application you are trying to integrate against. Whether you have selected Google Drive or another app, you will therefore need to log in with your normal username and password.
If you have not previously integrated with an account, this screen may look slightly different.
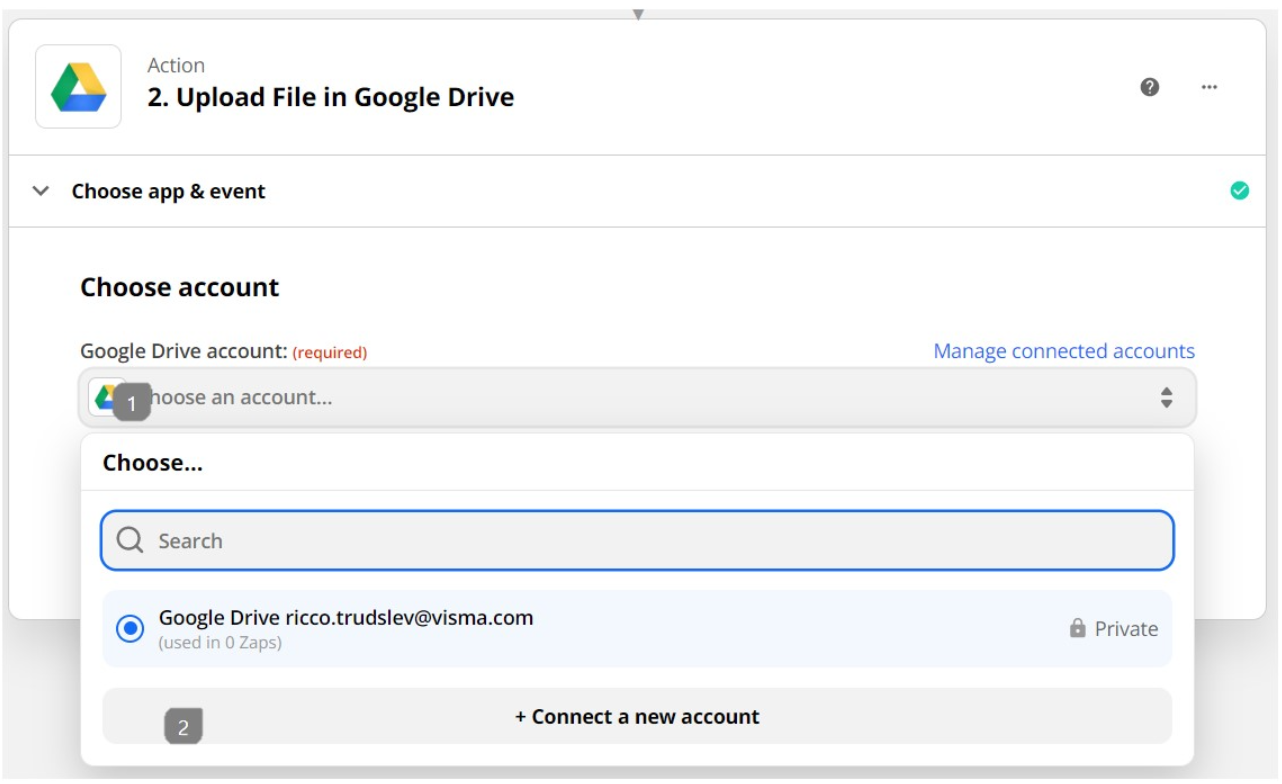
- Tap "Choose an account..."
- Press "Connect a new account"
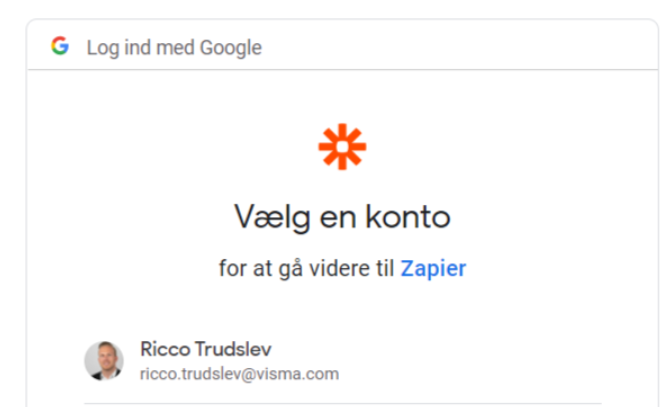
Now just tap on the account you want to connect Zapier to.
If you have not logged into your account before, it may ask for a username and password.
Since Zapier needs access to your google account in order for distribution to happen, you must allow Zapier to "view, edit, create and delete all your google drive files".
Note: We have only asked Zapier to upload files into your drive, so it will not delete anything without you asking the application to do so.
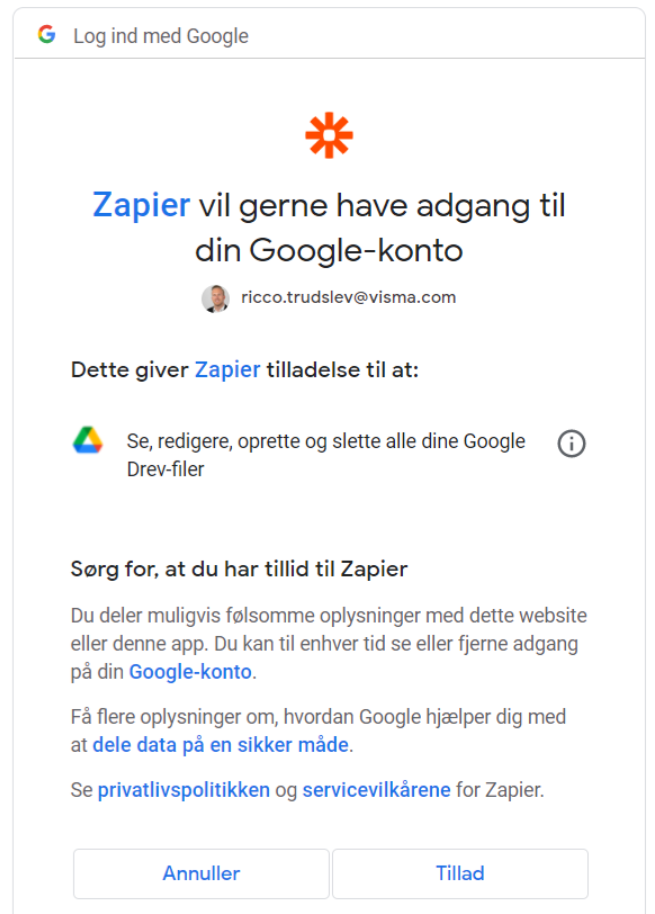
Then press "Continue".
Choose where the document lands
In the next step, there are a number of options, each of which is really important to consider. We will walk you through each below. You need to decide both which drive the files will end up in, which folder the document will be placed in, and other elements that are decided here.
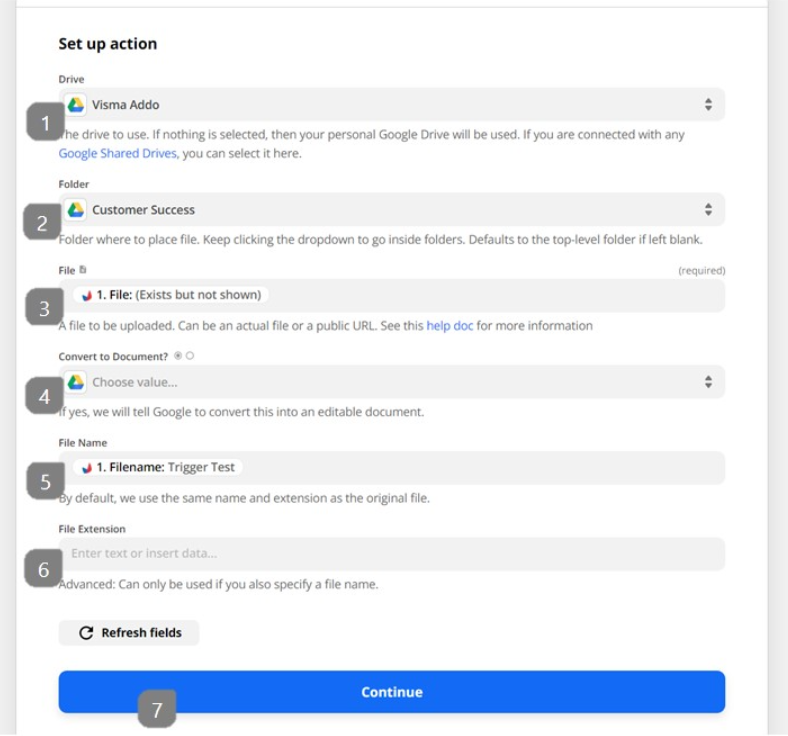
- in "Drive" you choose which drive you want to use. It can either be your personal drive or one that you are invited to. Here all your available drives will be visible.
- "Folder" is the folder in which the file will be stored. The folder must be available in the drive you have available, otherwise it will not be visible here.
- "File" is a field where you simply select "File" in the drop-down menu that appears when you tap the field. This controls the uploading of the document
- "Convert to document" is left blank, as the PDF you get in Google Drive should not be editable, as this will destroy the stamps and digital certificate that are embedded in a digitally signed document.
- "Filename" Here you simply press the drop-down menu and select "filename"
- "File Extension" Here you can select the extension, i.e. the format of the document. This must also be left blank.
- Simply press continue when you have finished the above.
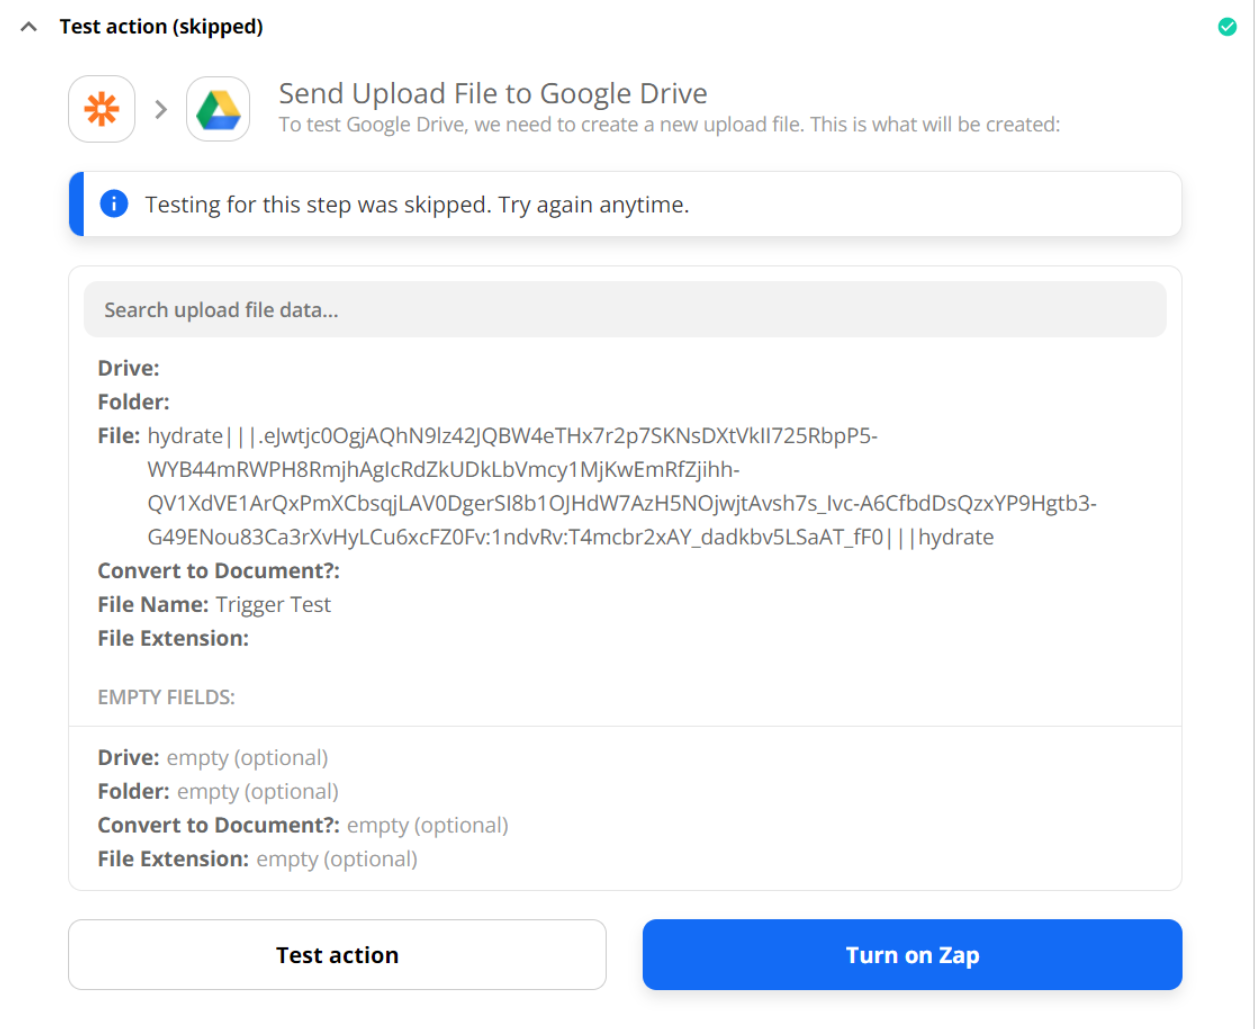
Test if the Google drive integration works
After you have filled in the above information and pressed "Continue" you will be presented with a page where you can test if the integration works.
Here you have 2 options: "Test & Review" and "Test & Continue"
"Test & Review": Zapier gives you the option to send a test through, where you can see afterwards if everything looks as it should.
"Test & Continue": if you press this you simply proceed to the point where you can activate the integration.
You are now at the last step where you just need to press "Turn on Zap" to fully activate the integration.